Gaining a clear view of the past is important to any decision-maker. But additional value can be found with data analytics through the ability to predict what may come in the future. Modern data science and machine learning capabilities have created a wealth of possibilities for organizations seeking a view into the future. In this tutorial, we’ll look at how to leverage Snowpark to create a linear regression model to power predictive analytics.
Why Snowpark for Data Science
Certain predictive analytic workloads require massive amounts of data, along with the storage capacity and compute power to process that data. Many organizations are choosing Snowflake as their data platform because it’s ideally suited to data-intensive workloads, and Snowpark is a great example of the innovation they’re bringing to cloud data warehouses and data lakes.
Snowpark is a new developer experience for Snowflake that allows data engineers, analytics engineers, and data scientists all to write code in their preferred language and run that code directly on Snowflake. Snowpark easily facilitates the many operations that need to be done in predictive modeling, including not only pushing down the SQL code of ETL and data curation pipelines, but also pushing down your OOP code for your data science workloads. The ability to run data science workloads directly on your data warehouse without exporting your data out to an outside platform brings both tangible benefits and general ease of maintenance. Using Snowpark for your data science workloads, you can leverage Snowflake’s native MPP compute power and automatically scale that compute power, only paying for the compute that you use.
Setting Up Snowpark
If you’re using Python, the first step is to make sure that you have Python version 3.8 installed on your machine, since this is the only version that the Snowflake-Snowpark-Python package currently supports. You’ll also want to install the pandas (version 1.5.1), scikit-learn (version 1.1.3), Matplotlib (version 3.5.3), and JupyterLab Python packages.
SnowPark leverages Conda as the Python package manager in the servers that will be running your code. The packages and most recent version of each of these packages can be found here. You’ll want your local package installations to match these versions in order to always maintain the same expected behavior running in both. The Conda integration allows you to avoid managing dependencies (which in many cases can cause breaking changes if not handled correctly) on the servers that will be running your code. The package-specific PyPI page for each should help in this process, the link for which can be found here. Additionally, you can also use Java or Scala with Snowpark as your programming language of choice, you will just need to adjust syntax accordingly to carry out the steps that will be shown in Python in this writing.
Assuming you have these packages installed now, your next step will be to create a JupyterLab server. While there are many ways you can run code using Snowpark, I’ll be showing you my preferred approach for data science projects, which is leveraging JupyterLab. Typically, when conducting a data science project, you’ll want to begin with exploratory data analysis, best done with a series of code blocks that can each display a quick result, making JupyterLab the perfect solution. Ultimately once you’ve tested any data points or analyzed any metrics you feel are relevant to your question, and you’ve trained your model, you can deploy your User Defined Function to Snowflake from its own Jupyter cell. Another big part of data science projects is explainability and being able to tell a story, which is another strength of JupyterLab, letting the series of short code snippets and visual outputs being the various elements of your story.
Once you have your Python packages installed, including JupyterLab, you can open up a local terminal and create a new directory that you would like to house your Jupyter files in with the ‘mkdir’ command, switch to that directory with the ‘cd’ command, and then run the command ‘jupyter-lab’. This command will deploy a server on your local host on port 8080 and automatically launch the address it can be accessed at in your machine’s default browser. If you’d like to learn more about JupyterLab specifically, the documentation can be found here.
Now hat we’re in our JupyterLab instance we can begin to start our SnowPark workflow, the first step of which is to import our needed packages, for this example specifically we’ll be using the ones that can be found in the screenshot below.
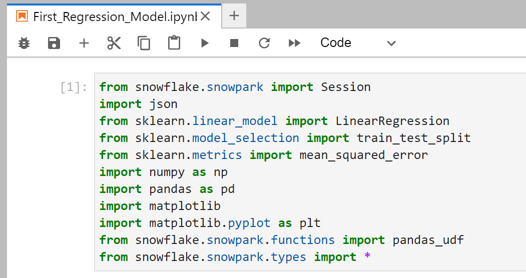
An extensive list of methods can be imported from the Snowpark package, but here we’ll be leveraging Session, which allows us to establish connectivity to our Snowflake account, pandas_udf which allows us to write our trained model to a Snowflake UDF, and everything from types so that we can declare any types that we end up needing to.
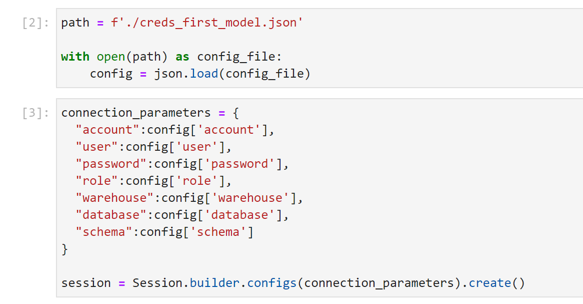
We’ll need to enter our credentials for our Snowflake account in order to establish a connection, and since we want to have this final notebook as an artifact to share with other team members or stakeholders, we do not want to have anything in plain text. We will use the JSON package to reference a file that we have locally with our credentials stored inside of it as seen below.
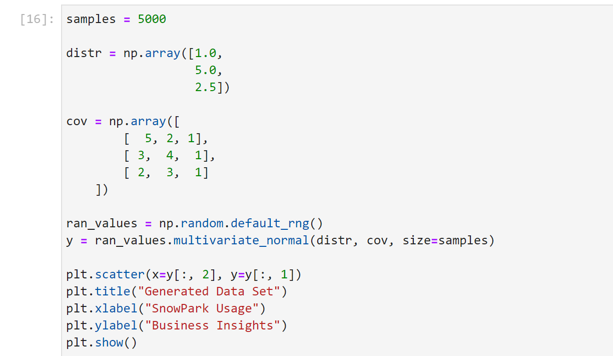
Once we have our session established, we can begin leveraging Snowflake data and pushing down the operations from our JupyterLab environment to Snowflake’s compute when we are interacting with that data. Since the focus of this tutorial is on the concepts of working with Snowpark and not an in-depth exploration of data science or data wrangling techniques, we’ll use a dummy data set to keep things simple. We’ll generate a relatively correlated dataset with a positive overall trend as seen in the screenshot below. And for the sake of adding context, we’ll refer to our X-axis value Snowpark usage, and we’ll refer to our Y-axis value Business Insights.

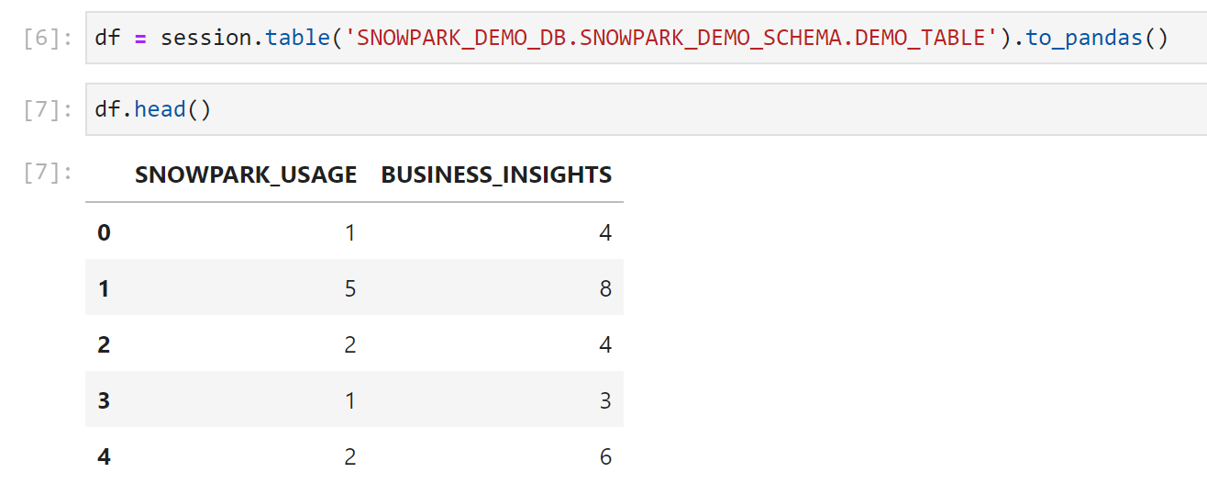
Now we want to pull this table into our JupyterLab environment using the Snowpark package. (Since this is a dummy data set, I generated an INSERT statement using my dataset and a for loop. This is not part of a typical workflow, but wanted to call it out so there’s no confusion as to how this local data set ended up in Snowflake.) We can run the command below to reference any table that our authenticated role has access to. We’ll check the first five values quickly to ensure everything looks as expected.
When it comes to procuring data for a data science workload, you’ll typically need to join multiple tables in order to reach the curated data set that is ready for training with all of the features and the target that you need. You can even leverage the Snowflake Marketplace to get external data sets, such as weather data, to add additional features and enrich your dataset (and hopefully increase your model’s accuracy). You have a variety of options that can make your dataset incredibly robust for training your model, and Snowpark helps to make interacting with all of this easy and computationally efficient.
Training a Simple Regression Model in Snowpark
With our dataset loaded into Snowflake and the dataframe that references it created in JupyterLab, we can now train our simple regression model. For the purposes of this tutorial, we’ll train our model with scikit-learn and not apply any additional techniques or adjustments. (Note that this limited training approach is beneficial for getting a quick answer to test a hypothesis, but is not sufficient for a productionized ML endpoint. You’ll want to leverage additional techniques to prevent overfitting in your model and to make sure that you are producing the most accurate model that you can.)
Now we’ll create our train and test data partitions so that we can train our model and then test it for accuracy on data it has not seen, and fit our model as seen in the code below.
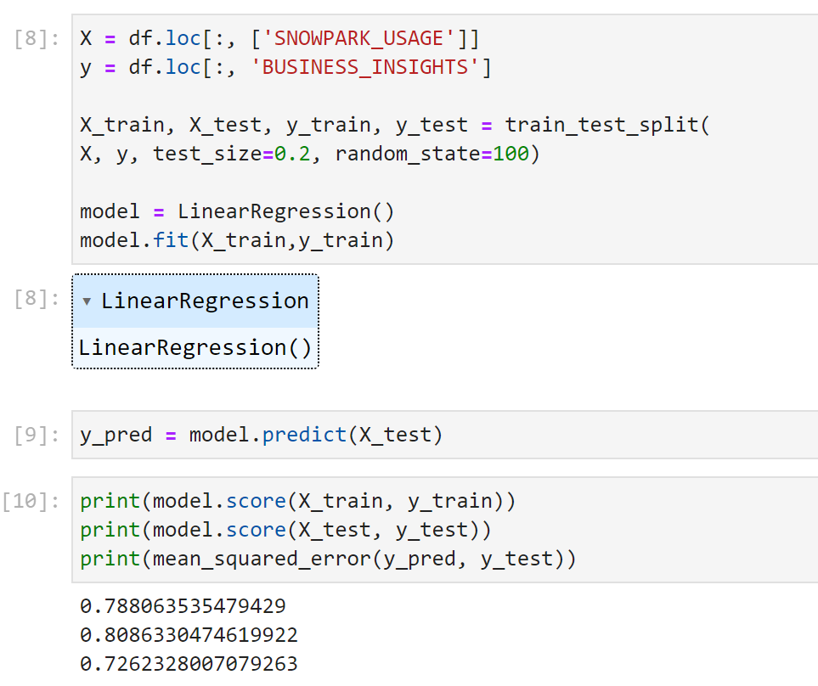
We see that without any tuning, our model is roughly 80% accurate with a relatively low mean squared error value of 0.7. I would encourage you to leverage additional metrics to test your model’s performance and to continuously iterate and adjust parameters to improve accuracy before deploying for production purposes.
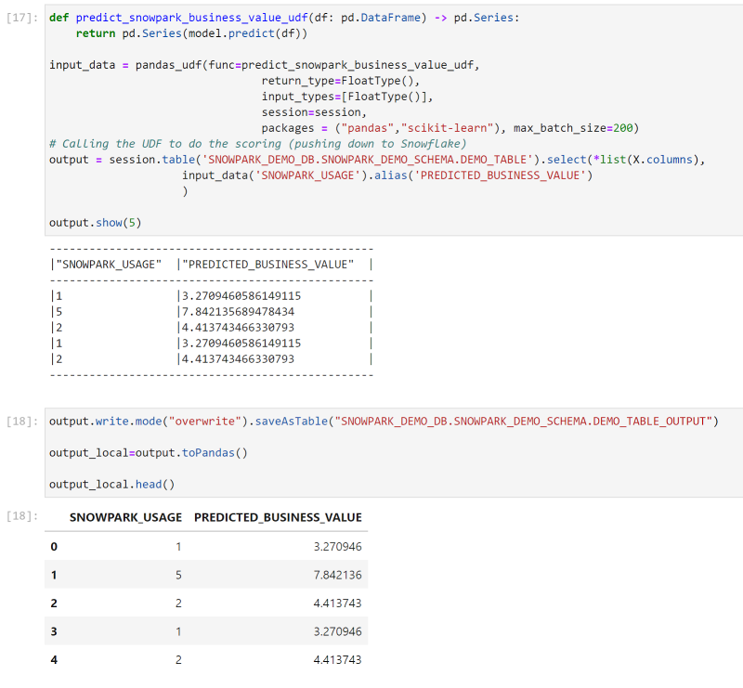
We can create a function to write our predicted results to a Snowflake table as seen below, for other users to view the results and have additional context for any related business decision-making.
A next possible step is to create a column in an existing table that leverages our model to have new values predicted as we insert new data into the table. There are a variety of approaches you can take to productionize and apply MLOps to the model you’ve created, especially with all of the tools provided by Snowflake.
Now that you have the basics of using Snowpark, I hope you explore all of the possibilities for your use case! If you’re not quite sure where to start to take the next steps in your data science and machine learning journey, contact us to chat with our experts.